Table of Contents
How do I disassemble my Glock?
About this Glock Cleaning Guide
Glock pistols are some of the most reliable semi-auto handguns available today. However, even the most reliable firearms will experience issues if you fail to clean and maintain them properly. Plus, a clean gun performs better than a dirty one, so careful maintenance ensures you are shooting as accurately as possible.
In this guide, you will learn how to clean and maintain a Glock pistol. I'll discuss the gear you need to clean it, how to disassemble it properly, how to both clean and lubricate it, and how to put it back together. I'll also share a few tips along the way so your cleaning session is thorough and safe.
Gun Cleaning Gear
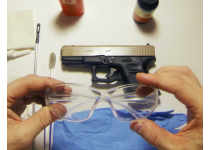
To effectively clean your Glock, you should arrange a proper workspace. That means an area where all live ammunition has been removed, where's there's plenty of light and ventilation, and has essential gun cleaning supplies, such as:
- A cleaning rod
- Cleaning patches
- Cleaning solvent
- Lubricating oil
- Clean rags (white)
- Dedicated toothbrush
- Appropriate caliber copper bore brush (optional)
- Safety glasses
- Latex gloves
There are a variety of brands for each piece of gear. However, for the cleaning solvent and lubricating oil, I prefer to use Hoppe's No. 9.
Unload Your Glock
Gun safety is the number one priority when handling firearms and it's especially important when you're cleaning one. You hear stories all the time about negligent discharges because someone forgot to unload their gun before they started cleaning. Don't be that person. The first step to cleaning any firearm is unloading it. To unload a Glock, you:
- Point the muzzle in a safe direction
- Remove the magazine from the gun
- Pull the slide to the rear and lock it back
- Visually and physically inspect the chamber
- If a cartridge is in the chamber, remove it immediately
Additionally, always exercise the four rules of gun safety before, during, and after you unload your firearm. In other words, follow ALL gun safety rules ALL the times.
Disassemble Your Glock
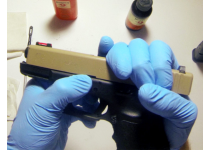
After you've removed the magazine and emptied the chamber, you need to field strip your Glock. Compared to a lot of other handgun designs, a Glock pistol is extremely easy to field strip. It breaks down into four main parts: slide, recoil spring assembly, barrel, and frame. To field strip a Glock, you should:
- Verify the chamber is clear and guide the slide home
- Keep the empty pistol pointed in a safe direction and pull the trigger
- With one hand, pull the slide back about a 1/4 inch and hold it
- With the other hand, grip the takedown levers on the frame and pull down
- While keeping pressure on the takedown levers, push the slide forward
- Guide the slide off the frame and put the frame down
- Flip the slide over and remove the recoil spring assembly
- Lastly, remove the barrel from the slide (it should move with little to no effort)
Clean the Frame Assembly
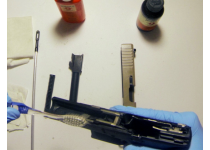
The polymer frame is how you hold and control your Glock. To clean the frame assembly, use the toothbrush to scrub away any dirt or carbon build up on internal metal components. This includes the metal rails, locking block, trigger bar, trigger mechanism housing, and dust cover area on the front of the frame.
Next, dab a quarter-sized amount of cleaning solvent onto a clean patch and wipe all of the areas that you scrubbed with the toothbrush. Repeat this step as much as you need. You'll know you're done when the cleaning patch pulls up little to no grime.
Clean the Slide Assembly
Most of the action happens on the inside of the slide assembly, so it's important to keep it clean. The slide assembly breaks down into three main parts: the slide, recoil spring assembly, and barrel.
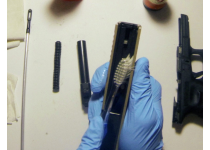 Cleaning the slide
- Scrub the inside of the slide with the toothbrush, especially areas with dirt or carbon buildup.
- Apply a cleaning solvent onto a new patch and wipe the inside of the slide thoroughly.
- Repeat these steps until little or no carbon appears on a fresh cleaning patch.
Cleaning the barrel
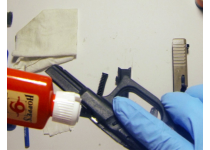 Thread a patch dabbed with cleaning solvent through your rod and punch the rod all the way through the barrel starting from the chamber side. Repeat this process, changing out the patch every few punches, until little or no gunk appears on the patch.
- Inspect the barrel by shining a light through it; if you see particles stuck to the inside - which is called "fouling" - proceed to the next step.
- Attach the appropriate-sized bore brush to your rod, then punch the rod through the barrel starting from the chamber side and rotate the brush in the direction of the barrel grooves. Continue this process until you have removed all the fouling.
- Lastly, wipe the outside of the barrel, including the feed ramp and recoil lug, with a patch dabbed with cleaning solvent.
Cleaning the recoil spring assembly
The recoil spring assembly consists of a guide rod and spring. However, you won't be able to separate them on a factory Glock. Cleaning it is simple. Just wipe down the recoil spring assembly with a fresh patch lightly dabbed with cleaning solvent.
Lubricate Your Glock
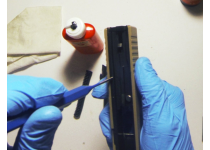
Lubricate your firearm sparingly. If you use too much lube, the gun will gum up quicker. I find it best to apply a single drop on the component you want to lubricate and then rub the lub in with your fingers. If you need more, add another drop. But, again, do it sparingly.
Lubricating the Frame Assembly
On the frame assembly, lube the four metal integrated rails (highlighted in the picture) and inside the trigger housing where the trigger rubs against the trigger bar. Lube will keep your trigger pull smooth.
Lubricating the Slide Assembly
Since the slide does most of the moving, it's important to put a thin coat of lube on the inside. Do this, again, one drop at a time and then spread it with your finger. Lastly, put a thin coat on the exterior of the barrel. Do NOT oil the inside of the barrel, as this can cause obstructions when you are shooting.
Reassemble Your Glock
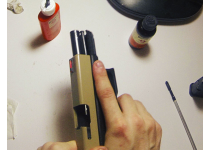
After cleaning and lubing your Glock, it's time to put it back together. Reassembling a Glock pistol is even easier than taking it apart.
- Start with the slide. With the slide upside down, insert the barrel so the recoil lug faces upward and away from the muzzle-end of the slide.
- Next, insert the fat end of the recoil spring assembly into its appropriate place above the barrel, and then wedge it between the slide and barrel recoil lug.
- Put the slide on the frame. Guide the slide assembly onto the first two rails of the frame, pull the slide all the way back, and then let it ride forward. It shouldn't come off.
- Perform a function check but do NOT replace the magazine or any ammo. Point the gun in a safe direction, pull the trigger and hold it, rack the slide back, and then release the trigger. The trigger should reset.
Clean Up
Now that you know everything inside your Glock is clean and maintained, use a clean rag to wipe away any excess oil that might have seeped out. Check around the areas where the slide meets the frame, and the trigger. To do the best job you can, rack the slide a few times to move things a bit and push out extra oil. When you're done, throw away the dirty rags because they're flammable dispose of other trash.
