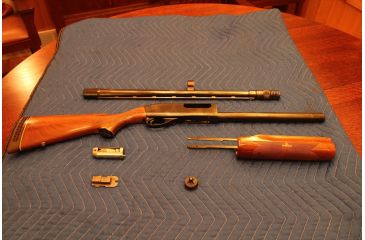
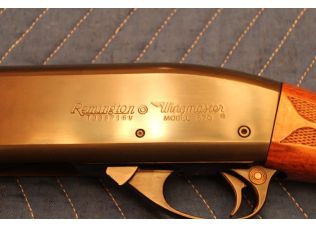
 Today I get to write about one of my favorite and one of the best firearms that I can think of. Well to be more specific I am going to enlighten anyone who needs to know how to disassemble, clean, and reassemble an American gem that is the Remington 870 shotgun.
![]()
These gun cleaning directions are applicable to any shotgun in the 870 family. Speaking of family, the Remington 870 series of shotguns is the only 3-generation shotgun still being used stateside. That makes it one of the oldest shotguns that's still in production and some of the earliest ones are still in fantastic operating condition and they are coveted for their history and outstanding performance. Not to get into any numbers or anything but the Remington 870 has been in production for nearly half a century and has sold over 10 million units across the world making it the number one selling shotgun in any category ever produced anywhere.
I personally own several of these reliable beautiess and wouldn't mind owning a few more. I love my 870 Wingmaster Express that is cut down 2" with a custom Dyna-choke that depending on my shooting I can switch the pin in under 2 seconds. And have spent days with my 870 slugger sitting high in a tree or stalking a deer through dense woods while hunting. To be honest, with the countless guns I have bought, sold, and traded over the years, I can honestly say I still have every Remington 870 I have ever owned. This fact is something that has never dawned on me until I sat down to write a how to guide for the Remington 870.
To keep these guns in working condition doesn't take much. In fact, I have shot mine covered in clay from the bottom of a creek without issue. I have put thousands of shells through my 870's I have shot every type of "shot" imaginable from bird and foul shot to home defense and 00 buck shot and my coveted Hornady 12 gauge SST Slugs. I have never had a hang fire or light primer hit. My very first and probably most prized 870 even has what is referred to as "dew marks" which is the slightest amount of rusting due to long periods of holding the gun in your hand and the acids in your perspiration actually leave your custom rust-like print on the gun. At first I was ready to run to the shop and have it taken care of, but I began to grow fond of it as it adds some character and history to the gun.
Shotguns are made to take a beating and they get dirty, but that's ok. With a little love and maintenance you will have a heirloom piece that you can pass down to your family one day. With just a few minutes spent cleaning these shotguns, they will perform and look as good as the day you took it home from the store. These pump action shotguns are extremely simple and deliver reliable tack driving performance for long after we will be able to shoot them. So let's get into how to disassemble, clean, and re-assemble that piece of American history you want to take care of!
Prepare the Work Area
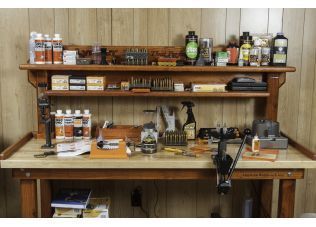 Something I never see mentioned in other cleaning directions is to start by finding a high table or flat surface to work on. The higher the table the better, as you won't be crouched over the entire time hurting your back struggling to see. Cleaning a shotgun is also far easier to do while standing, so you can reach for items and move without straining your back and neck. Also, having the gun up high prevents children and animals from getting in the way making the process and work area safer.
Get yourself some newspapers or old rags to put on the table. I cannot emphasize enough the importance of covering the surface of what you are working on. Unless you are sitting in your workshop on top of a bench that is already stained, you are most certainly going to want newspapers, towels etc., on the surface. This protects the underlying surface and your gun from the solvent and spent gunpowder residue. All it takes is a loose screw or metal shavings on top of your workbench to scratch the gun or the stock when moving around.
What Gun Cleaning Supplies Do You Need?
Bore Snake/Ripcord
Using a bore snake or ripcord instead of a traditional cleaning rod reduces the length of the cleaning process. These tools are wonderful for all gun owners and even the hunter on the move that wants to quickly clean their firearm without a bench or fully dissassembly. Hoppes has been producing bore snakes for some years now, but Otis has stepped into the game with their ripcord design. Simply slide these tools through the breach and into the bore and then pull them out toward the barrel. This allows the wire pieces and coarse areas of the cord to remove hardened powder residue and foreign objects with ease.
Cleaning Products
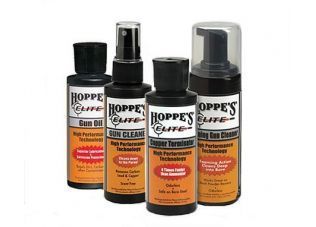 Get the cleaning solvents together before you start. This part comes down to user preference and what brand and types of cleaning products that you like to use. Myself and many others grew up using the brown bottle of Hoppes No. 9. Make sure that you have ample cleaning patches and rags ready. Having all the required gear and some extra supplies makes the cleaning process faster, as you won't have to search for more gear later.
There are many cleaning products and companies making these products. The three products that I like to use are Hoppes No. 9, M-PRO 7, and Rem Oil.
Hoppes No. 9 is one of the most popular gun solvents because it is reliable and leaves your guns sparkling for a cheap price. M-Pro 7 by Hoppes is a wonderful new line of cleaning products that is 100% biodegradable and scent free. This means you can work on your guns all day and your hands will not smell like an old rag for days. Scent-free is beneficial as the fumes from other products can become intense at times even causing other members of the household to complain. Regardless of the solvent you use, ensure proper ventilation when cleaning guns to keep the air safe and easy to breathe.
Remington oil is a newer product on the market and is produced by the maker of your 870, and Remington suggests this specific product to clean the trigger assembly. Rem Oil makes gun cleaning easy as it comes in pre-lubricated patches that you can immediately use to clean your guns. For the occasional wipe down and cleaning process for the guns that sit in the safe, this is a great tool to have at your disposal. Rem Oil is unique because it cleans and lubricates at the same time, while also leaving a tiny layer of Teflon to ensure that metal parts are not grinding on each other.
Safety
Now that you have the work area prepped and all the cleaning materials ready time to get the 870 from its safe spot. As always, immediately check to make sure the weapon is unloaded. Don't just check the chamber; pump the gun a few times to make sure there is not one hiding in the tube!
Tips From The Pros
Whenever I plan a hunting trip or extended range day, I take my boresnake with me. I will douse it in Rem Oil and place the rope in a small plastic bag and throw it in whatever bag or pouch I have open or available. Then I can open my bag and run the boresnake right through whenever I need it.
Cleaning Your Remington 870
Magazine/Tube
Unscrew the magazine cap located under the barrel, near where the pump handle stops when pumping outwards. If you are having trouble getting the cap loose, you can use a towel to get a better grip. If you are still having a difficult time, get a pair of pliers out and tighten them around the towel so that you don't scratch or mar the finish on the gun.
Try to keep some forward pressure on the tube during this process, as the cap is spring loaded and will try to pop out. Use light pressure while unscrewing the cap to prevent the spring from flying out and getting damaged. Once you remove the cap, you can slide the entire barrel out of the receiver to separate it from the barrel.
Bolt Carrier
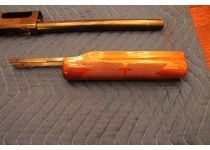 After removing the barrel, separate the bolt carrier and the fore-end assembly unit. This is an easy process that is hard to put into words. This is pretty similar to operating your pool side umbrella on you patio, as the entire unit is held together through a couple of pins that you must decompress to move it up and down. The same concept applies to the fore-end housing unit for the bolt carrier.
Simply turn the shotgun upside down and look into the bottom port where you load the shells. Inside the port are two metal strips that are spring loaded, so press them in until they are released. This releases the fore-end and you can slide it out like the barrel.
Trigger Group
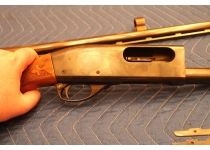 Removing the trigger group is so easy its rather astounding in the simplicity. Before starting, make sure that the gun safety is on so that you don't hit the trigger and cause the hammer to strike your finger.
Take a wooden dowl rod or a golf tee and tap out the two pins located directly above the trigger housing. The bigger of the two tends to pop out very easily but the smaller of the two can be difficult. In this case, a golf tee is an excellent tool because it is softer than the metal and wont scratch or damage the gun's finish. They also have an extremely small point and a flat broad surface to tap with a hammer or blunt object. Once you get the pin free from the stock, begin cleaning the whole unit and try to dry off any excess cleaning product before reassembly.
*Remember that the trigger assembly is suggested by Remington to be cleaned with Rem Oil.*
Bore Cleaning
The next step is to clean the bore. Spray some solvent into the barrel and run your boresnake from the chamber toward the barrel until the inside is free from debris. If you plan to use a cleaning rod, make sure you use the designated size for your gauge of shotgun. Remember to also clean the outside of the bore as well. The outside of the bore or barrel is constantly exposed to moisture and acidic properties from your perspiration, so it's important to clean these areas. The same solvent or cleaning products can be used for the outside of the barrel as well.
Clean Everything!
Clean every inch of the gun. Don't just clean the parts that get used; clean all sides of the parts inside and out. If you have a wooden stock, you may need to condition or clean the wood or buff out scratches. Household wood products work great and really bring back that gorgeous finish that you had on the stock with little effort.
How to Reassemble a Remington 870
Step 1: Trigger Group
Reinstall the trigger group back into the gun. Make sure the trigger group is dry and doesn't have any excess lubrication on it before reassembling the gun. Put the trigger group back into the gun and secure it using the two pins you removed earlier.
Step 2: Bolt Carrier
Insert the fore-end and the bolt carrier. Do this by sliding the fore-end back in. You might have to decompress the metal strips you pressed in to release the bolt carrier and fore-end while doing this.
Step 3: Barrel
Re-Insert the barrel by sliding it back into the housing it came out of.
Step 4: Magazine Spring and Cap
Put the spring back inside and tight the magazine cap. Place pressure on the cap as you screw it back on the threads, as this counteracts the energy in the spring to make the process easier. Once you have made several twists with the cap you can release the pressure and continue to turn the cap until you cannot turn it any further. Remember to not use pliers or excessive force when tightening the cap back on, as to much torque can damage the gun or strip the threads.
All Done
You have now disassembled, cleaned, and reassembled your Remington 870, so congratulations! Pretty amazing how is easy it is after you do it for the first time. Now continue to clean your Remington 870 after every use and you will have a lifetime of reliable shooting ahead of you.
