


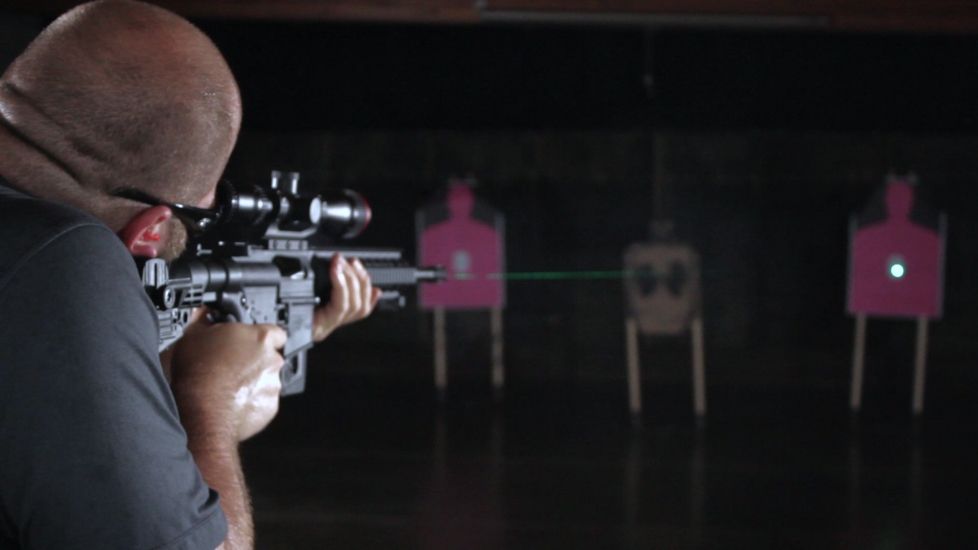
The Crimson Trace LiNQ is the World's first wireless grip activated green laser and white light combo. Every system has its own individual closed signature - ensuring that each LiNQ system will not interfere with other LiNQ units, nor any other RF or wireless systems. The Instinctive Activation button allows the user to control the 300-lumen LED White Light and Green Laser module in four different modes: laser only; light only; laser and light on; and laser on with strobing light. These options can also be controlled with the independent module control button on the back of the laser/light module. The ergonomic grip includes a Sync light to provide the user with immediate feedback to ensure the system is working properly, as well as a manual power switch to easily turn the unit on or off.![]()
Note: The Crimson Trace LiNQ has been discontinued since the original publish date of this guide. However, several technological advancements of the LiNQ, such as Instinctive Activation, have been implemented in newer Crimson Trace products, including the Rail Master series and Crimson Trace Laserguards.
What's in the Box?
Included in the package with the grip and the laser is:
- Installation guide and warranty card
- Batteries for the flashlight/laser unit and the grip
- All hardware and tools to install the unit on any AR-type rifle
- Cleaning swabs for the laser/light lenses
- Laser safety stickers.
The unit will be factory paired, and the laser will be factory sighted for 50 yards.
How to Install Batteries in the Crimson Trace LiNQ
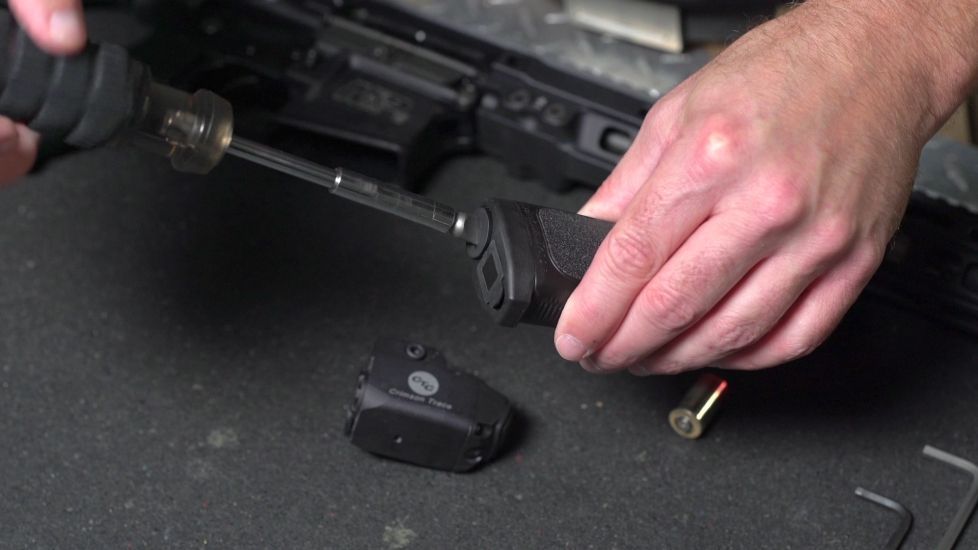
The battery cap to the laser/light module is easily accessible from the front of the unit, allowing the user to change the battery without disconnecting the unit from the rail. Using a flathead screwdriver or thin coin, turn the cap counter-clockwise to open. Insert the CR123 battery positive side first. Then, insert the cap and turn clockwise to tighten. Do not overtighten.
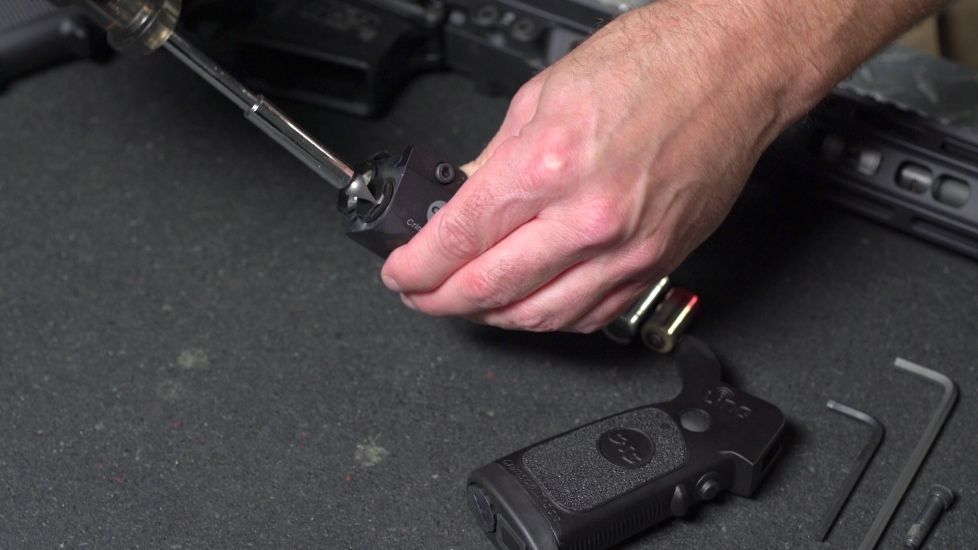
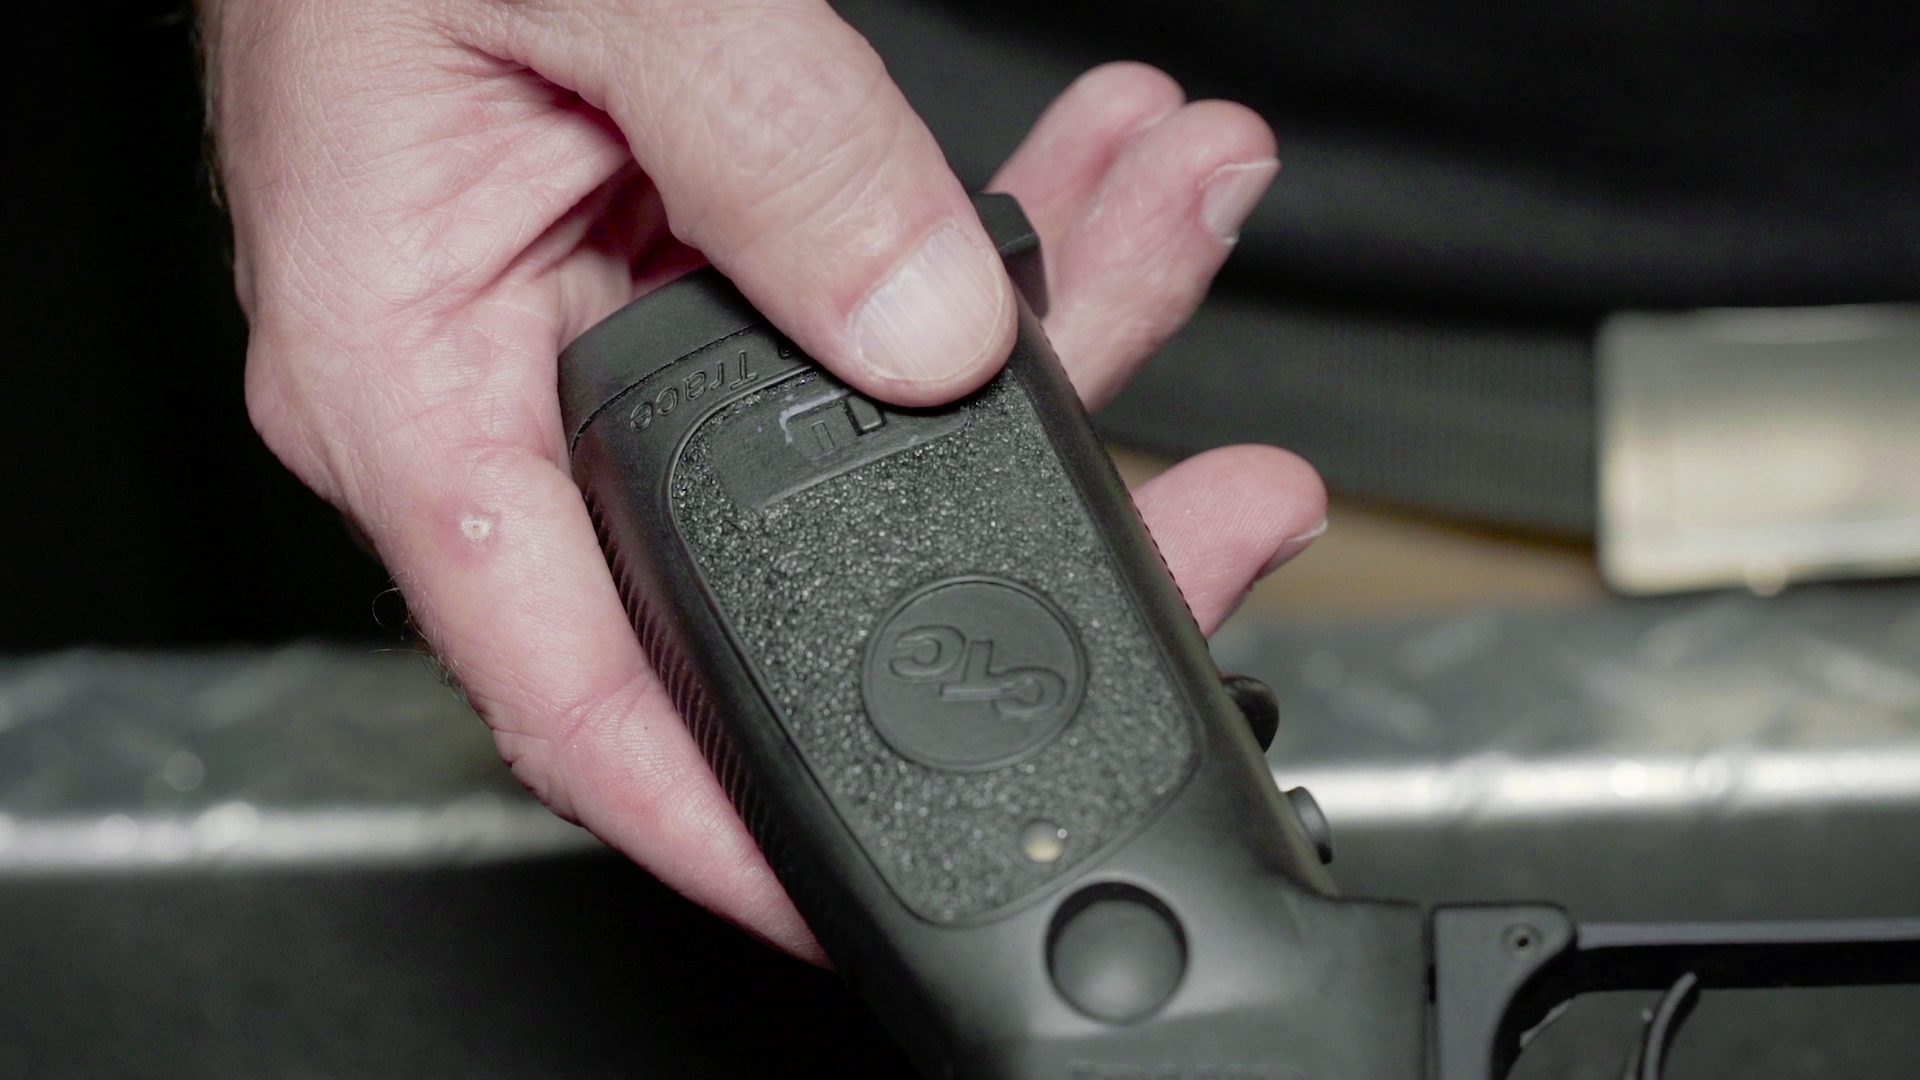
The grip battery cap is located on the bottom of the grip. Insert the CR2 battery positive side first, then replace the cap. Do not overtighten. The unit has a two-hour runtime at full illumination, which is light and laser at constant on.
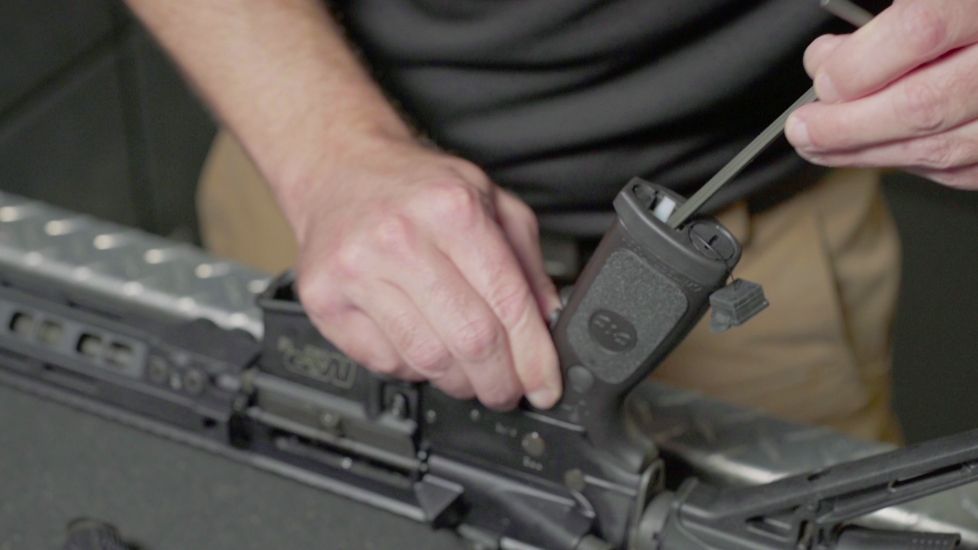
How to Install the Crimson Trace LiNQ Grip
Remove the existing gun grip and make sure to keep the detent spring, as this will be reused with the grip.
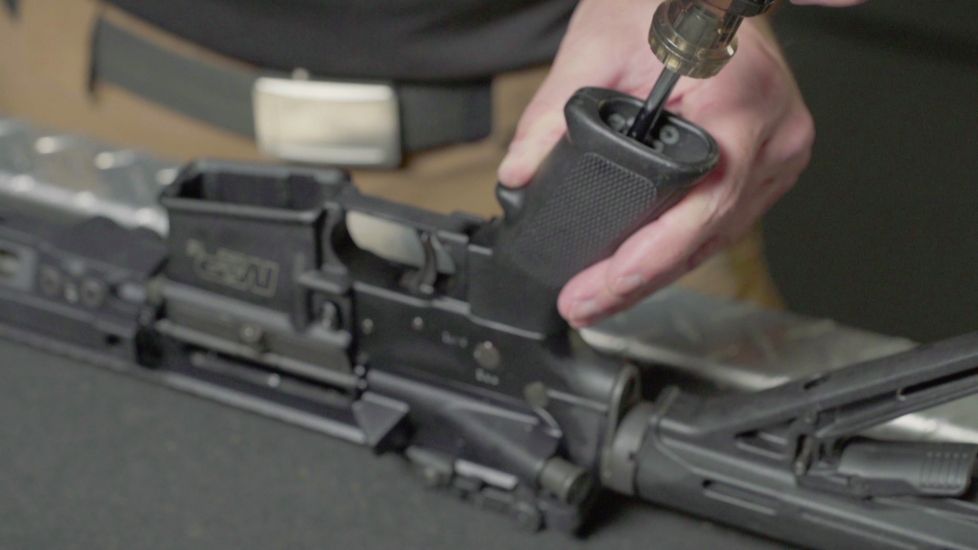
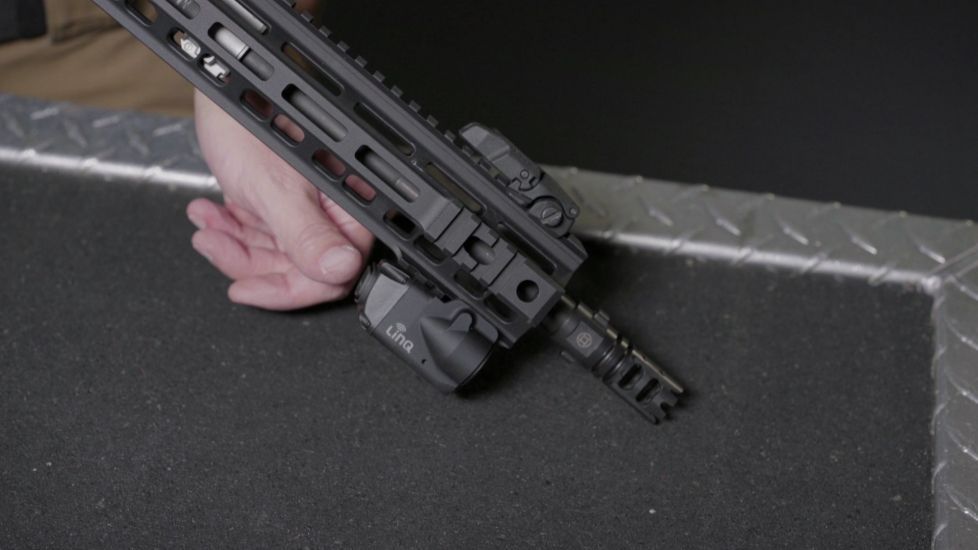
Install the Crimson Trace grip using the included hardware and tools. Once the grip has been installed, double-check that the gun safety lever is functioning properly. The grip is now installed and ready to activate. The laser/light module can be attached to any address on a Picatinny rail using the standard cross bolt.
How to Activate the Crimson Trace LiNQ
To sync the grip to the module, simply slide the power button to on. Press the Instinctive Activation button to turn the module on. To cycle through the modes with the grip, hold the Mode Selection button down along with the Instinctive Activation button. This will cycle through the modes. Once the module is in the mode you want, simply let go of the Instinctive Activation button.
To cycle through the modes with the module, hold the mode button down on the back of the light module. Simply let go of the mode button once the unit is in the mode that you desire.
In the event that the grip and module are no longer paired, turn the grip Master power switch to the off position. Simultaneously press and hold the module pairing button and both of the grip mode buttons for 5 seconds, then release. The sync indicator light on the grip will blink green to show that the units are pairing. Once paired, the sync indicator light will change to a steady green for 15 seconds, indicating that the grip and module are now synced. If the sync indicator blinks red after 5 minutes, the pairing process must be reattempted.
