


This article, how to add AR15 accessories to your rifle, is the third in a three-part series on building an AR rifle. Part one covers building the upper receiver and part two covers building the lower receiver. While they’re both important in their own right, adding accessories is the most fun. ![]()
The AR 15 parts you should mount and where you mount them depends on your application. While you could use your AR15 for just about any shooting activity -- hunting, duty, or target practice -- you’ll want the best gear that helps you effectively engage targets.
For this article, we will configure our AR 15 for a 3-Gun match, so we’ll show you how to mount a variable power scope, offset iron sights, a sling, an M-LOK rail, and a weapon light. This is an extremely versatile setup that gives you the power to shoot targets from short-range, medium-range, and even some long-range scenarios. Some people call these AR15 tactical accessories while others just call them accessories.
Installing a Rifle Scope
In this section, we’ll explain how to mount a rifle scope, but just know that there’s no one way to do it. In fact, we have a detailed article covering that topic. Nonetheless, I have two goals when I mount a rifle scope. First, I want the scope to be level, and second, I want it positioned so I have plenty of eye relief.
On our rifle, there’s a Picatinny rail on the upper receiver, which we’ll use to attach a single-piece Vortex mount and a Vortex Strike Eagle 1-6x24 scope. The scope has been really popular among shooters and 3-Gun competitors because it’s effective for about 600 yards. To make sure the scope is mounted how I want it, I follow four steps.
Mount the Scope Rings
Starting out, place the one-piece mount or scope rings on the upper receiver, and then push them as far forward in the Picatinny slots as possible. Next, remove the eight ring screws and top rings, place the scope on the mount, and then put the rings and screws back on. Don’t tighten the screws all the way just yet because you still need to adjust the scope.
Check for Eye Relief
At this point, you should assess whether or not you have enough eye relief. The easiest and most effective way to do this is to aim the rifle while in the prone position. The reason is that’s where your eyebox will be most difficult. If you're too close to where the scope will be, move the rings further down the barrel. Once you position it correctly, it’s time to level the crosshairs on the scope.
Level the Scope
The simplest way to level the crosshairs is use a level and a plumb bob. You can check to see if it’s level horizontally (or along the x-axis) by placing the bubble level on the top of the Picatinny rail. To make sure it’s level vertically, hang a weight or a plumb bob using string and then align the crosshairs with the string.
Tighten the Screws
After the scope is level, tighten the eight scope ring screws. Before you do, check the manufacturer’s guidelines to see how much torque should be applied. Then, best practice is to alternate the screws you tighten much like you would the lug nuts on a car tire. Additionally, it’s recommended that you apply Loctite to each screw so they don’t loosen up when you fire. However, this can make it extremely difficult to remove the scope rings later on if you want to switch them.
Installing Offset Iron Sights
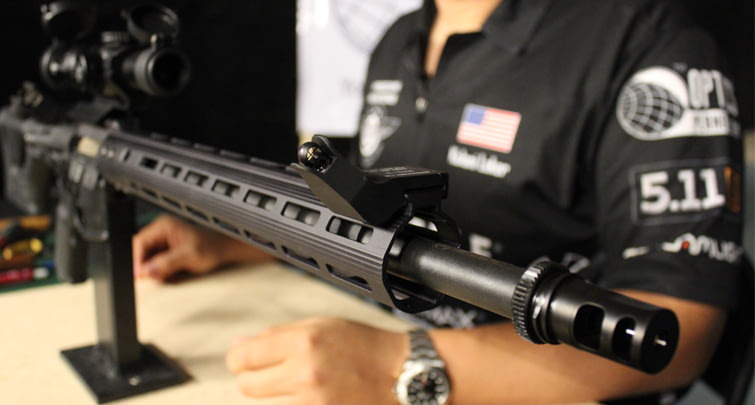
The process for installing AR15 iron sights is a lot like installing a scope, but for this example, we’re installing offset iron sights. That means that they’ll be positioned at a 45-degree angle on the handguards. This configuration allows you to switch between using the LPVO and the iron sights quickly without having the sights interfere with each other. To install them, you should space the front and rear sight as far apart as possible. For the rear sight, though, just make sure you have room to twist the power ring on your scope.
Perhaps, what’s more important than explaining how to install offset iron sights, though, is why you might want them, especially for 3-Gun. When you’re in a match, you won’t have time to adjust your scope as you change between short and long range, so offset iron sights come in handy. Another reason is if your primary optics goes down or gets damaged, you have back up sights. This is useful both in competitions and in military and law enforcement scenarios, where suddenly not having a working optic can be extremely dangerous. Backup iron sights are "analog" and work without batteries or any other bells and whistles.
One other pro-tip is to zero your iron sights for 50 yards. That way they’ll be effective at short range and if you’re like me, you’ll be comfortable using them out to about 200 yards if you need to.
Installing a Rifle Sling
Some handguards have a quick detach (QD) sling mount (it's just a little hole) while others have the older sling loops. While they’re both effective for holding a rifle sling, the loop requires a little more effort. One advantage of a QD sling mount is that you can detach it easily depending on the situation. If your rifle has neither, you might need additional attachments.
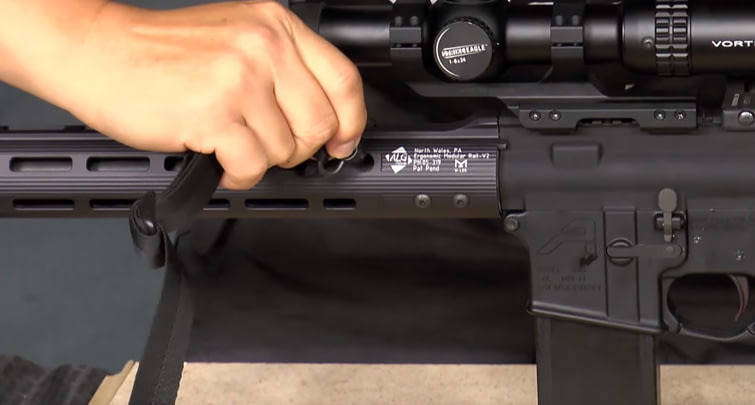
On our rifle, we’ll install a 5.11 VTAC Padded Sling through a PRS stock, which has a regular sling loop, and to ALG handguards, which have a QD mount. The sling itself is comfortable and has a wide range of adjustability, so it can fit any kind of body type. It's also a 2-point sling, so it provides plenty of extra support when aiming.
To install the rifle sling, you first have to find the front and rear of the sling. In our case, the padded side is the rear, so we just thread it through accordingly. An important thing to remember is when you lace the sling through the loops make sure to double the webbing back so it doesn't unravel. If it does, the sling might fall free and you could drop your rifle.
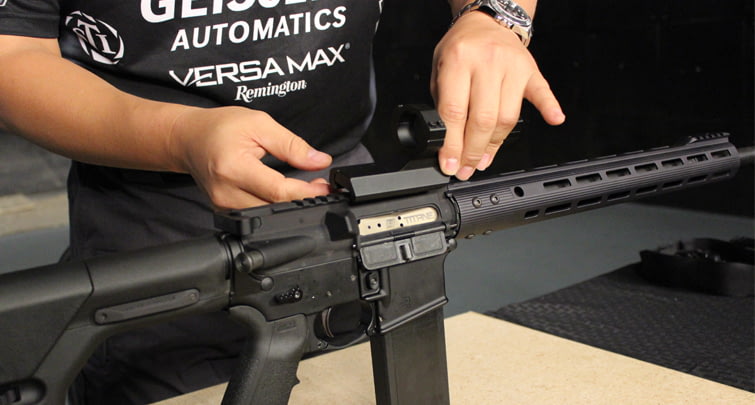
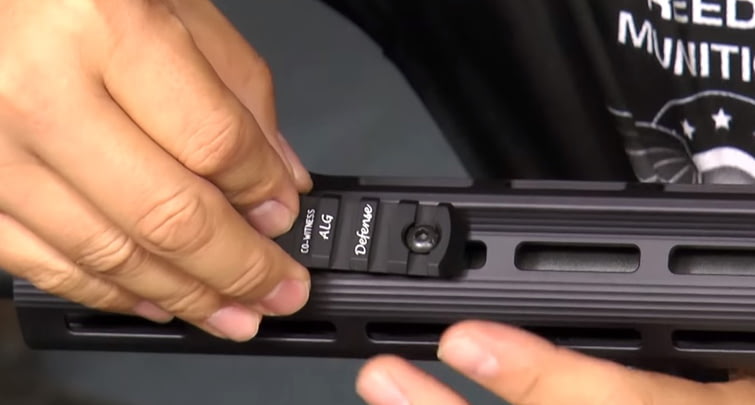
Installing an M-LOK Rail
A rail system is one of the best AR 15 accessories you can add to your rifle. Our rifle has handguards designed for an M-LOK system. The system is a series of slots that allow you to mount different size tactical rails and attachments that have M-LOK ports. The concept allows you to mount only the rail you need for whatever you’re trying to mount, so this helps keep the rifle’s weight to a minimum. To install an M-LOK rail:
- First, figure out where you want the rail on the handguard.
- Next, slide the screw through the rail and thread it into the T nut.
- Afterward, tighten the screw while holding the T nut until it’s flush.
Installing a Flashlight
Now that we have the M-LOK rail attached, we want to mount a flashlight. Obviously, you won’t need a weapon light if you’re exlusively shooting outside during the day, but they come in handy at night and it’s not uncommon to have a 3-Gun match at night. Additionally, if you're in the military or an officer, a flashlight is crucial in dark corriders and other close-quarters situations.
On this rifle, we’re attaching a Streamlight TLR-1 HL. It’s high-powered light that allows you to engage targets about 200 to 300 yards away in the middle of the night. Mounting this Streamlight is really easy. You just slide it onto the rail and tighten it up with a screwdriver.
The only hard part is figuring out where you want it. Basically, you want to be able to reach it without moving your support hand up and down the rail. To get it just right, you might have to move the M-LOK rail. Generallly, people place the flashlight on a side rail where they rest their forward hand so that they can turn it on and off quickly.
Parting Shots
For the most part, adding AR 15 accessories to your rifle is fairly straightforward. This completes our three-part series on how to build an AR 15. If you want more tips about training or gear, check out our library of How-To Guides. And, if you have any questions, send them to us through our Contact Us page.


