


For most shooters, building an AR 15 is a bucket-list item. It's right up there with shooting a .50-cal or hitting a bullseye at 1,000 yards. And it makes sense. AR rifles are easy to modify and reconfigure, so building one lets you customize every part. The parts are standardized and largely interchangeable. That's why we put together a series of guides on How to Build an AR15. ![]()
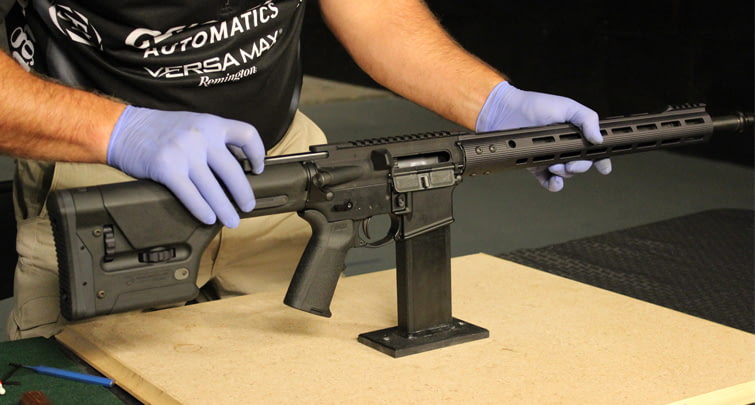
Taking a bird's eye view, an AR consists of two halves. The bottom half, the lower receiver, houses the firing controls like the mag well, safety selector, and of course trigger. And then the top half, the upper receiver, is where the magic happens. It's home to the chamber, bolt-carrier group, barrel, and more.
This article will focus on building an AR15 upper receiver. We'll show you how to assemble the features as well as the parts that make the gun function. We'll cover installation for the forward assist, ejection port cover, gas block, gas tube, barrel, free float handguard, muzzle device, bolt carrier group, and charging handle.
Tools and Gear
Before we dive right into it, you should collect a handful of gunsmithing tools and gear, so you have an easier and safer time making the mods. To properly install a barrel, it's best practice to use a vise, holding fixture, armorer's wrench, and some anti-seize stick so you don't damage the threads. Plus, you may want to wear safety glasses and gloves. Now let's begin!
Forward Assist
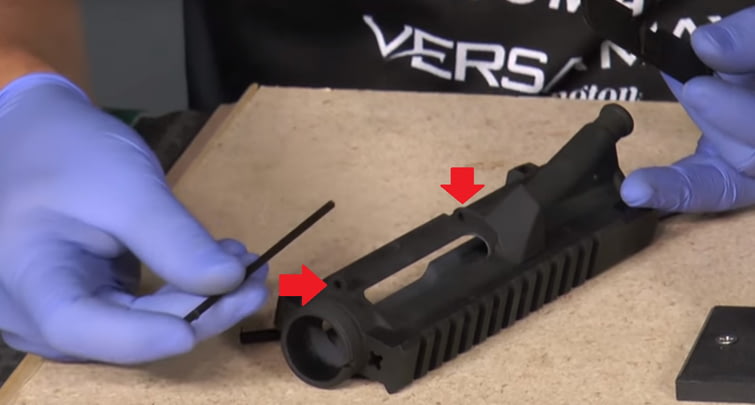
The forward assist button is designed to nudge the bolt carrier group forward, so it locks into place. The button is located on the left side of the receiver and positioned so right-handed shooters can press it with their thumb. The forward assist assembly breaks down into three parts. The forward assist, a return spring, and a roll pin.
How To Install A Forward Assist
- Grease the forward assist and return spring, and secure the receiver into a vise
- Slide the spring onto the forward assist, and then insert it into the hole in the receiver
- Align the forward assist with the hole in the receiver, and hold it in place with a slave pin
- Insert the roll pin through both receiver and forward assist; punch it through until flush
- Test the forward assist button; it should bounce back when you release pressure
Ejection Port Cover
The ejection port cover, also called the dust cover, is a horizontal flap below the ejection port. As the name so accurately implies, it's designed to cover up the ejection port so dust doesn't get inside the receiver. When things like dirt or sand get in, they eventually cause the gun to jam by interfering with the bolt.
To use the ejection port cover, you just simply close it and it locks into place. Then, it will automatically unlock and pop down whenever the bolt moves (backward or forward). The dust cover consists of four parts: the cover, a rod, e-clip, and spring. The e-clip secures the other components to the receiver.
How To Install An Ejection Port Cover
- Slide the e-clip over the groove in the rod (use needle nose pliers to hold it)
- Grease the rod and insert it through the receiver and first half of the cover
- Put the spring into the center, so the long end is on the right side and points up
- Apply pressure on the spring and rotate the right side clockwise, so the long end is down
- Drive the rod through both the spring and the dust cover until it reaches the opposite end
- Test the ejection port cover by closing it, and then open it by moving the BCG
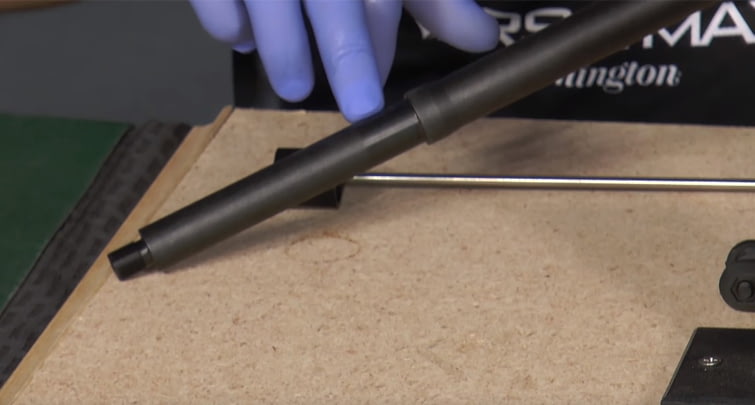
Barrel
An AR 15 barrel is just like a barrel on any other firearm. It's the tube in which a bullet travels when the rifle is fired. Inside the barrel is rifling, or spiraled grooves, that twist the bullet as it travels through for increased velocity. On paper, installing a barrel is fairly intuitive. You slide the barrel into the receiver and then fix them together with a barrel nut. But in practice, it's not so simple.
The barrel and receiver are designed with tight tolerances, so the gun can both withstand and control the tiny explosions that occur inside the chamber. Additionally, your AR rifle might not shoot straight if you misalign the threads.
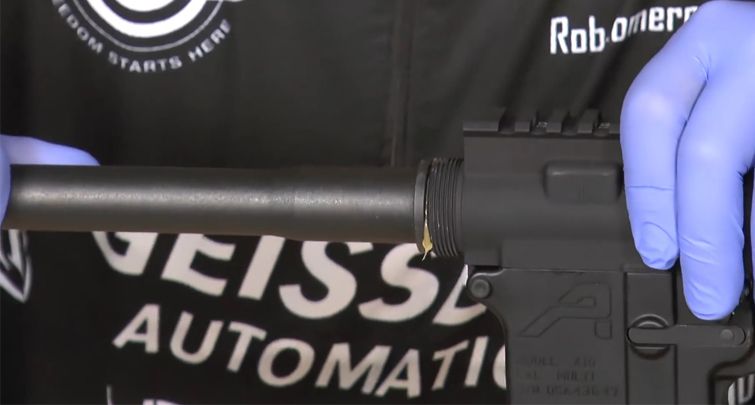
How to Install An AR Barrel
- Apply anti-seize to the threads and then slide the barrel into the upper receiver
- Screw on the barrel nut until hand tight, and then tighten with the armorer's wrench
- Tighten the barrel to at least between 30 to 80 foot-pounds
- Align the barrel nut so that the gas tube has room to slide freely into place
Pro Tip: Depending on the free float handguard you're using, it may require the use of shims to properly time the barrel nut so that the screws line up correctly on the handguard. Always go with the manufacturer's instructions for your particular handguard with regards to shims and how to properly install the handguard.
Gas System
An AR15 gas system consists of two main components: a gas tube and a gas block. They work together to control propellant gases, but to understand how, you'll need to know how gas flows through the rifle.
When you fire an AR 15, gas pushes the bullet through the barrel. Gas exits both the muzzle and a tiny hole near the muzzle called a gas port. The gas port is covered by a gas block, which holds one end of the gas tube. Gas flows from the gas port and through a tiny hole in the gas tube, which redirects it to the gas key on the bolt carrier group. When gas hits the gas key, it pushes the bolt to the rear.
A standard gas block will allow enough gas to pass so the gun cycles, but there are also adjustable gas blocks, so you can regulate how much gas passes through the gas tube. Such a feature allows you to optimize performance and minimize (or increase) recoil. This is especially useful if you plan to suppress the rifle, as reducing the amount of gas improves performance.
How to Install the Gas Block and Gas Tube
- Insert the end of the gas tube with the holes into the gas block and align the holes
- Secure the gas tube to the gas block with the roll pin and then make sure it's flush
- Slide the gas block over the front of the barrel, so it aligns with the gas port
- Simultaneously, insert the other end of the gas tube into the receiver
- Note: it shouldn't rest on the d-ring
- Fasten the gas block with a roll pin, so it's flush
Pro Tip: Higher-end barrel makers put dimples on the bottom of the barrel for the set screws on the gas block, but if your barrel doesn't have dimples, you can mark both the gas block and the barrel with a pencil.
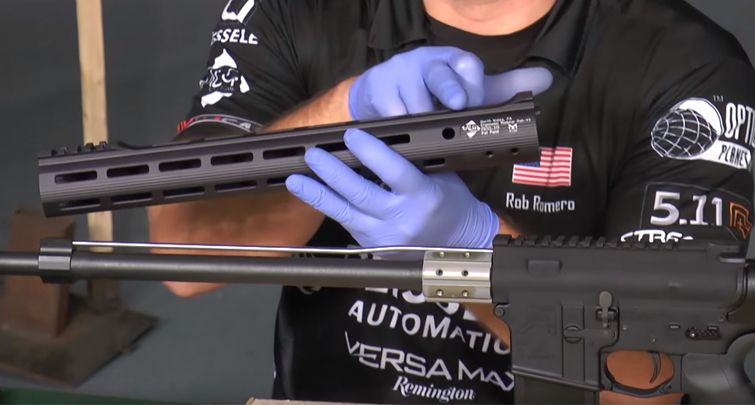
Free-Float Handguard
A typical AR15 handguard is meant to give you an easier time gripping the rifle with your support hand while also protecting your hand from the hot barrel. However, a free-float handguard offers much greater benefits.
As the name implies, a free float handguard allows your barrel to "float," meaning it doesn't come in contact with the barrel. This gives the barrel better harmonics because it can react without interference and in turn, better accuracy. Additionally, since it doesn't directly contact the barrel, much less heat transfers to the handguard. This makes it easier and more comfortable to shoot, especially during longer shooting sessions.
A free-float handguard system usually consists of the handguard and a barrel nut. Installation is the same whether you're adding it to an AR 15 you're building or modifying an existing one. However, if it's a mod, you'll most likely have to disassemble the front sight and gas system.
How to Install a Free-Float Handguard
Disassembly
- Remove the existing handguard and separate the upper receiver from the lower receiver
- Drive out the gas-tube roll pin in the front-sight base and then remove the tube and base
- Secure the upper receiver in a vise, loosen the barrel nut, and remove it
Install
- Slide the barrel nut over the barrel and then screw it onto the receiver
- Slide the float tube along with the gas tube and front sight base onto barrel
- Screw the float tube onto the barrel nut, and re-install the pins in the base
Muzzle Device
Depending on the design, a muzzle device can mitigate recoil, help control muzzle rise, lessen the sound of a gunshot, or reduce the flash when you fire. How exactly a muzzle device works depends on which one you decide to use. When you fire a gun, the force that pushes the bullet out of the barrel, i.e. propellant gases, also pushes back on you. This is called recoil. However, a muzzle brake works by redirecting that force away from the shooter.
A muzzle device usually consists of a washer and the device. Installation is rather simple in that you just screw it onto the muzzle of the barrel, but there are a few other details you need to be aware of.

How to Install a Muzzle Device
- Put the barrel into a vise, screw the washer and muzzle device on so it's hand tight
- On the final turn, use an open wrench and tighten the device to completion
- For muzzle brakes, make sure the ports are positioned correctly. Check the owner's manual with the device to see the correct positioning for your model.
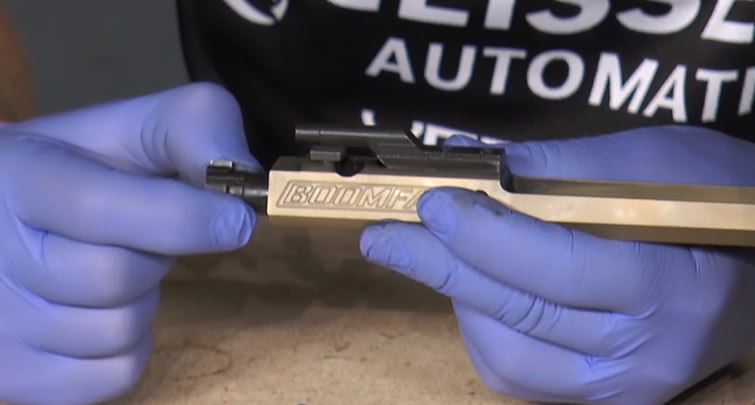
Bolt Carrier Group (BCG)
Many call the bolt carrier group (BCG) the heart of the AR because it's the part that makes the gun work. When you pull the trigger, the hammer strikes the firing pin, which pierces the primer, and then once the gas pushes the bullet out of the muzzle, it cycles back onto the gas key on the bolt carrier. Next, the BCG slides back, resets the hammer, and then bounces back. On its way forward, it strips off a round from the magazine and loads it into the chamber.
With that being said, the BCG takes a lot of abuse. While it's built extremely well, it still gets dirty and wears overtime, so you need to know how to take care of it. A BCG consists of the bolt, bolt carrier, gas key, extractor, firing pin, cam pin, and retainer pin.
How to Install a Bolt Carrier Group
- Insert the bolt into the carrier with the extractor to the right side
- Align the cam pin with the cam-pin hole in the bolt and install the cam pin
- The cam pin should be inserted lengthwise along the bolt carrier
- With the cam pin seated, rotate the cam pin 90 degrees
- The cam pin should move freely in the slot
- Insert the firing pin in the rear of the bolt and push it in as far as possible
- Insert the firing pin retainer pin into the hole on the left side of the carrier
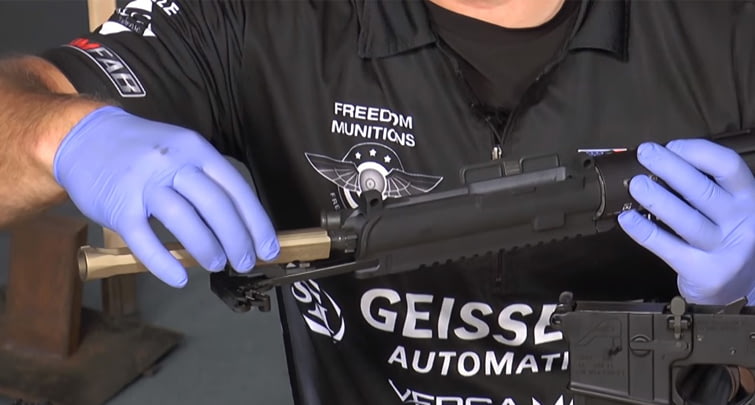
Charging Handle
An AR 15 charging handle gives you the ability to get things started. When you pull back on the charging handle, it pulls the bolt with it. If you want to load your AR, you'll slingshot it, meaning pull it back all the way and then let go so it rides home on its own. The charging handle usually comes fully intact, so installation is easy.
How to Install a Charging Handle
- Grab the charging handle by the T and match it with the slot in the upper receiver
- Slide the charging handle in about half way and insert the BCG with the bolt forward
- The gas key of the BCG should fit within the groove in the charging handle
- Push both the charging handle and the BCG all the way into the chamber
Parting Shots
Building out an AR upper can be one of the most satisfying projects you can do. If you're interested in learning How to Customize Your AR15, we have a guide for that! You can also check out our article on How to Build an AR15 Lower and How to Add AR15 Accessories. And as always, you can find all your AR15 Parts on OpticsPlanet!


