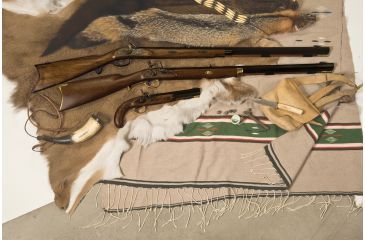
Modern muzzleloaders have come a long way from the old days of loose powder and the required raccoon hat! Today's muzzleloaders are much more user friendly and also far more accurate. Through the use of new powders and breech designs these "smokepoles" are now easier to operate and clean than ever before.![]()
If you haven't ever tried to go on a muzzy hunt I highly recommend it. Most states have extended hunting seasons or annual seasons just for muzzleloader use. For anyone looking to get a little more time in the woods, give it a shot. For fairly cheap you can purchase a high quality rifle with accuracy that will blow you away. The new sabot slugs and rifled bores combined with pre-packed powder pellets really take out a lot of the work and guessing that was involved over the years past.
It's essential to keep these guns clean to maintain reliability and accuracy. Cleaning a muzzleloader is not more difficult than cleaning any other gun, as there are fewer moving parts. In fact, the simplicity behind these guns makes the process rather easy. Most of the top brands have pretty similar designs and parts, making cleaning them almost universal as far as cleaning and re-assembly.
There seem to be two common approaches to the process of cleaning a muzzleloader. The all natural process, and the solvents approach. I think that I more frequently follow the natural process, but there is always a time to implement some of the black powder gun cleaning solvents available. Everyone has their own ways of cleaning their muzzleloader and opinions about what is the best process, and this how-to guide will present you with a blend of the two styles.
Step 1: Prep the Area & Gather Supplies
 As mentioned in the how to guide for cleaning a Remington 870 I always suggest that you get all materials and tools that you need or may need out and ready to use before you start. Lay down ample newspaper or rags to protect the gun and workspace from stains and scratches. Find a high table or flat working area that's out of the reach of children and pets. A higher work area reduces strain on the back and makes seeing what you're doing easier and safer. Crack a window or turn on a fan to ventilate the area and prevent issues with chemicals building up when cleaning any weapon.
Get supplies together including:
- Black powder solvent
- Jags
- Gun Cleaning Rods/tips
- Brush/toothbrush
- Patches
- Breech Wrench
- Anti-Seize Grease
As always, unload the gun and remove any powder pellets or loose powder before starting. Check this when you get the gun out of the safe and right before you start cleaning. If the rifle is loaded, the best way and safest way to get rid of the bullet and loaded powder is to fire the gun. Find a dirt bank, or a safe area to fire the bullet or ball into the ground and never fire into the air.
Step 2: Remove the Breech & Rifle Action
Remove the breech: If you can, start by using your fingers to unscrew and remove the breech. If it's stubborn, grab a breech wrench and give it a little effort, it should come right out.
Remove the rifle action: This is usually easy, but can vary from manufacturer to manufacturer. Removing this exposes all moving parts of the rifle for you to easily and quickly clean. This also permits you access to every metal surface once you remove it from the stock.
Now that you have these two parts removed, it is time to clean them. I do prefer the hot water method to most and if needed some soap will work wonders. Yes, hot water and soap are always my first products of choice. However, for that stubborn stuck on grit in the breech, place some black powder solvent in a cup and let the breech sit for a little time as you clean the rest of the gun. After you take it out of the cup, check the breech hole for clearance. If it is still clogged or semi-clogged, a small pipe cleaner should remove any remaining particles on first contact.
Remember to always apply anti-seizing grease to the threads of the breech. Failure to do this may result in a locked breech or scorched grease that can ruin the rifle.
Step 3: Clean the Barrel
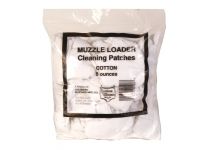 Cleaning the barrel or bore of the gun is one of the most important steps. It's extremely important to keep the bore clean and clear as fouling can result in just a few shots. Fouling leads to inconsistent shot placement and unreliability, potentially causing you to miss your only shot while out in the field. Hot soapy water with a bore brush attachment on your bar is an easy way to clean powder remnants quickly. After this, run several clean patches through the barrel to remove any remaining grit. Grab either pre-lubed patches or some commercial anti-rusting lubricant and coat the inside and outside of the barrel as well as the action. Let the barrel sit for 15-30 minutes after this to let it dry thoroughly before reassembly.
Step 4: Reassemble Your Muzzleloader
Now that the gun is dry, it is time to put it back together. Start with the breech and then install the action. Remember when installing the breech that it only needs to be snug, as overtightening this component can damage it.
Get Muzzleloader Tools & Supplies Today!
The purpose of cleaning your muzzleloader with water and specialized products is that the process actually seasons the gun for you. It is very similar to cooking and seasoning cast iron skillets; the more times you do it, the further the oil and protective properties penetrate the pores of the gun. This leads to better results and cleaner surfaces down the road. The more seasoned the barrel, the harder it is for fouling and rust to occur.
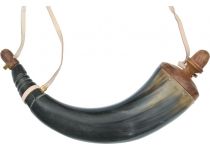
Now you can see this process is not nearly as bad you as are made to believe by all the old timers who still think you have to carry loose powder in a horn around your neck. Shoot your muzzleloader often and learn the gun so that you know how many shots before fouling and what your effective shooting range is. This can help guaranteed you a good time and great hunting seasons for many years to come.
