


Table of Contents
How do I prepare for AR 15 care?![]()
How do I field strip my AR 15?
How do I inspect and lubricate my AR 15?
How do I function check my AR 15?
Where can I find more information about AR 15 life?
Knowing how to properly clean and maintain an AR 15 is a big part of owning one. The more you shoot, the dirtier your gun will get. The dirtier your gun gets, the more likely you'll experience a malfunction or have to replace parts due to rust and damage. Also, you need to inspect your rifle every once in a while for damage. What better time to do it than when you clean it?
Cleaning an AR15 is like cleaning any other rifle. You scrub away dirt and carbon from key components with a brush and then wipe away residue with an oiled cloth. However, if you're a new AR owner, that's easier said than done. Therefore, this article will cover how to clean and maintain an AR 15. I'll discuss gear you'll need, disassembly, key parts, inspection, cleaning, reassembly, and how to perform a function check.
Before You Begin
There are many ways to clean an AR-style rifle, but this is my way. Some people use different solutions, tools, and methods. I use techniques I learned from many years in the U.S. Army, where I served as an infantryman and an armorer, and I also include things I have picked up as a casual shooter.
Before you start, you will need a few supplies. These include: a cleaning kit meant for the caliber of your rifle and some cleaning solutions like synthetic gun cleaner, gun oil or grease, copper solvent, and/or bore gel. Also, clean your AR in a designated workspace. The ideal location is a place that's well lit and has a flat surface because you will be handling multiple components, including small parts.
Unload Your AR

Safety is of the utmost importance when handling firearms. No matter where you are, at the range, at home, or cleaning your rifle, you should always follow the four rules of gun safety. Safety also includes removing all live ammunition from your workspace and unloading your rifle.
Unloading an AR15
- Remove the magazine from the mag well.
- Lock the bolt to the rear.
- Visually and physically inspect the chamber.
- If a round is in the chamber, remove it.
- Release bolt and put the rifle on safe.
Once you have unloaded your rifle and removed all live ammunition from your workspace, you can move on to the next step.
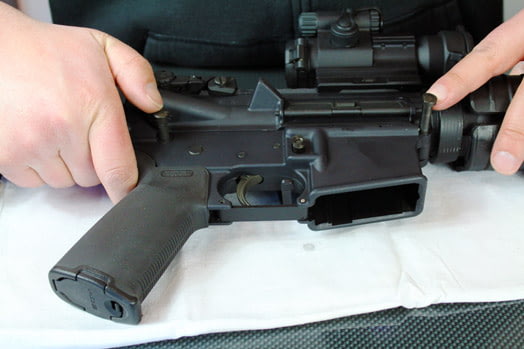
Field-Stripping an AR 15

Field stripping an AR 15 rifle is pretty simple. First, separate the upper receiver from the lower receiver. They're held together by two pins. Second, remove the charging handle and bolt carrier group from the upper receiver, and the buffer assembly and buffer spring from the lower receiver.
Separating the Upper from the Lower
- Push out both the front pivot pin and rear takedown pin. These are held in place by detents, so you won't be able to remove them all the way.
- Without the takedown pins fully inserted, the upper receiver will detach from the lower receiver.
Removing the Charging Handle and BCG from the Upper

- Remove the charging handle and bolt carrier group. These are separate parts, but when you remove the charging handle, you will pull the BCG out as well.
Disassembling the BCG
- Remove the cotter pin from a small hole in the side of the BCG.
- Remove the firing pin, which looks like a fencing foil, from the cut out.
- Move the bolt in the retracted position and rotate the cam pin 90 degrees.
- Remove the cam pin from the large hole on the side of the BCG.
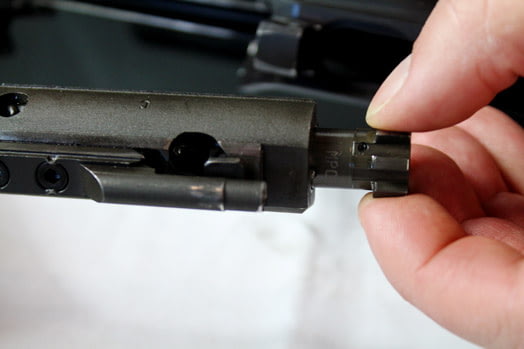
- Remove the bolt from the end of the BCG.
- Remove the extractor pin from the bolt (use a punch or the firing pin).
- Remove the extractor from the bolt.
Remove the Buffer and Buffer Spring from the Lower

- Depress the detent in the buffer tube to release the buffer and spring.
- Pull the buffer and spring out of the tube completely.
- Separate the buffer and buffer spring, and put them aside.
Cleaning the AR 15
Cleaning an AR15 is pretty much wiping each part until all the carbon and fouling are removed. You can do most of it with a cotton cloth, brush, and gun cleaner. However, there are a few areas that will require additional tools or solutions. Here's a breakdown of what you'll need for each component:
- Lower Receiver - Apply a foaming cleaner and then wipe with a cotton cloth. Q-Tips also work, but you might get cotton fibers everywhere.
- Bolt - Spray with any gun cleaner and then scrub with a brush and/or brass scraper.
- Extractor - Wipe with a cotton cloth, but be cautious around the spring and nylon bushing.
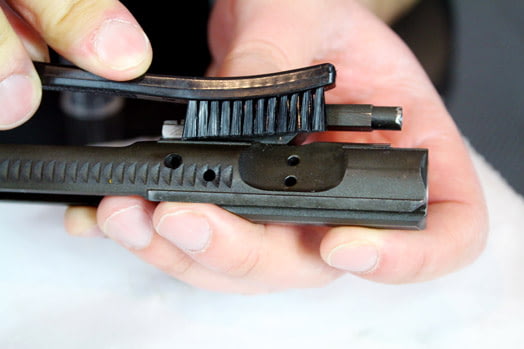
- Bolt Carrier - Clean with either a cotton cloth or brush.
- Bolt Cam Pin - Wipe with a cotton cloth.
- Charging Handle - Clean with a cotton cloth and brush.
- Upper Receiver - Clean with a cotton cloth and brush.
- Buffer - Wipe with a cotton cloth.
- Buffer Spring - Wipe with a cotton cloth.
Lastly, you have to clean the inside of the barrel, what's called the bore. This is a more involved process that involves bore patches, gun oil, rods, and a brass brush.
Cleaning the Barrel Bore
- Run a patch soaked with a carbon cleaner or bore gel through the bore using a punch rod.
- Insert the rod into the barrel starting from the chamber and punch forward through the muzzle. Repeat this step a few times.
- Attach the brass brush to the rod and punch the rod through the bore starting from the chamber and all the way through to the muzzle. Repeat a few times.
- Next, run dry patches through the bore until they come out clean.
- Afterward, I follow up with a patch soaked with a copper solvent. I use ammonia free solvent because ammonia is extremely corrosive. It can destroy a barrel when not properly mopped up. Therefore, I follow up with dry patches as well.
- Once the bore is completely clean and dry, put lubricant on a clean patch and punch it through the barrel. You should apply a light coat of oil to protect the bore from rust.
Inspecting and Lubricating an AR 15
Before reassembling your AR rifle, you should inspect each part for damage.. During inspection, pay special attention to these key areas:
- Bolt face - look for pitting or corrosion.
- Bolt - Make sure gas rings are intact and not bent.
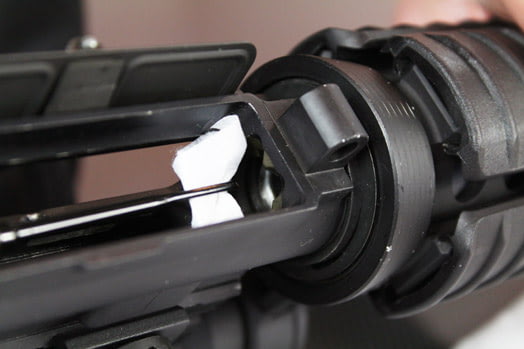
- Bolt Carrier and Key - make sure key is properly staked and the screws are tight.
- Buffer - check for cracks.
Afterward, fix or replace any unserviceable components and then lubricate metal components so they function properly and are protected from rust. Lubrication requires applying a light coat of oil.
Reassembling an AR 15
I typically put the rifle back together in reverse order.
- Install the buffer and buffer spring into the buffer tube.
- Install the extractor and extractor pin. Apply slight downward pressure to the extractor while installing the pin.
- Insert the bolt into the bolt carrier.
- Install the cam pin. The bolt must be oriented so that the extractor is visible in the cam pivot channel. The cam will only go in one way, so if it does not fit into the bolt, rotate it 180 degrees and try again.
- Rotate the cam 90 degrees and install the firing pin.
- Install the cotter pin.
- Extend the bolt and install the charging handle and bolt carrier assembly in the upper receiver.
- Join upper and lower receivers, and push the take down pins back in place.
Function Check an AR 15
Before doing anything, inspect your assembled AR 15 rifle. Look over the entire gun, from muzzle to buttstock, for any loose parts. Pay close attention to the pistol grip, buttstock, and muzzle device. If everything feels secure, move on to the function check.
A function check ensures that the rifle was assembled properly and it's also a good way to check for worn parts. During the function check, again, keep the gun unloaded and follow all four gun safety rules.
- Place the selector switch on fire and squeeze and hold down the trigger. You should hear the hammer strike the firing pin.
- While keeping the trigger depressed, pull the charging handle fully to the rear and let it go to reset the hammer.
- Release the trigger. You should hear a mechanical click. This is the disconnector releasing the hammer onto the trigger. If you do not hear a click, or the hammer completely falls onto the firing pin, you have a worn disconnector, hammer, or trigger and they need to be replaced.
- Place the selector switch on safe and try to pull the trigger. The hammer should not fall. If it does, there is a problem with your selector switch and/or trigger.
Life with an AR 15
Learning how to clean and maintain your AR 15 is a big part of owning one, but it's just one part. If you want to know more about life with an AR15, check out our other articles like How to Build a Lower Receiver, How to Build an Upper Receiver, and AR 15 Accessories.


