


Archery is growing quickly among the outdoor community, from backyard hobbyists to bowhunters and competitive & professional archers. There are some fundamental differences between shooting a traditional bow (like a recurve bow or longbow) and a compound bow. In this article, we’ll cover the basics of how to shoot a compound bow for beginners since they’re more popular these days for bowhunting and most commonly seen at the archery range. They’re also easier to shoot than a traditional bow (also known as “stick and string” in some circles).![]()
How Hard Is It to Shoot a Compound Bow vs. Recurve Bow
A compound bow may look complicated with all of the strings, wheels (called "cams"), and various different attachments depending on the setup, but in operation, they’re just as simple as a traditional bow. You draw back the arrow, take aim, and release. There are some finer points of course, and that starts with purchasing and setting up your equipment before you even take a shot.
With a compound bow, there are a variety of different release devices to choose from, and you can read more about that in our Archery Release Types for Bowhunters guide (it applies for target shooting, too.) Arrow selection can be confusing as well, so we put together another piece on How to Choose the Right Arrow.
Once you get the hang of it, shooting a compound bow is a lot easier than shooting a traditional recurve bow. They use cams that are designed to increase the power of the bow but make pulling the string back easier. The real payoff is when you’re holding the bow at full draw because the cams are holding the weight instead of your arms like they do when you're using a recurve or longbow. This means you can take more time aiming and practicing fundamentals without straining your back muscles too much.
How Do You Hold and Shoot a Compound Bow?
One huge advantage of compound bows is how adjustable they are. Draw weight and draw length are essential for both your performance and overall enjoyment of archery sports. Local archery clubs and shops can help you adjust these to get you the best fit. It's important to not try and do this yourself as an amateur since it requires special equipment like a bow press and specialized knowledge on how to do this safely.
A beginner shouldn’t attempt to DIY these steps at home, although you can add or swap out parts like bow sights, arrow rests, quivers, and all kinds of bowfishing parts and accessories. The exception is if you've purchased a bow that has an adjustable draw length that doesn't require a bow press, but it's still helpful to get an expert to help you with this while you're still a newbie.
Start With Draw Weight
This can vary anywhere from 10-15lbs for a small child, all the way up to 65-75lbs for a large adult. This is going to depend entirely on the strength of the archer and take into account things that might affect that, like previous surgeries or injuries.
Determine Draw Length
Draw length is generally easier to determine than draw weight and is based on the archer’s physical upper body dimensions. Your approximate draw length is measured by taking your full wingspan/arm span (arms outstretched and going from fingertip to fingertip) and dividing that by 2.5. This refers to the distance between the grip and the string when at a full draw.
For example, if your wingspan is 70 inches, your estimated draw length would be 28 inches (70 ÷ 2.5 = 28).
Proper Stance
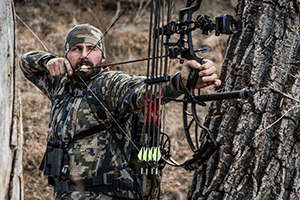
Since you draw the string back with your dominant hand, you’ll want to stand with your opposite foot toward the target. So a right-handed shooter would have their left foot toward the target, and left-handed folks would do the opposite (as they’re used to with everything else). Your exact foot position will vary from person to person and what’s comfortable but will usually have your leading foot angled at about 45-degrees and your back foot approximately 90-degrees from the target. Your chest should also be at a 90-degree angle from the target with your bow arm, shoulders, and draw hand all in a straight line pointed at the bullseye. Stand up nice and straight with your shoulders squared and your chest expanded. You shouldn’t be hunched over or leaning forward, backward, or sideways.
Grip
Your grip with your bow arm is very important. Many new archers want to hold the bow in a death grip, tensing up as our bodies naturally do when pulling something apart (in this case, the bow and string). In archery, you actually hold the bow fairly loose in a relaxed grip since the required tension is on your palm instead of your fingers or knuckles. When the bowstring is drawn back, the pressure goes to your palm between your thumb and fingers. Many compound bow archers use an open-finger method, forming a notch for the bow's grip to stabilize it. This will increase accuracy since your bow hand won’t be transferring any wobble or shakiness that a prolonged fist-grip will produce.
Draw & Anchor Point
To draw, you need to pull the bowstring all the way back in one smooth motion. Keep your elbow straight out, no higher or lower than your shoulder. This ensures that your back muscles are doing the work, not the relatively weaker muscles in your arm. Once you're at full draw and the cams are doing their job, you’ll notice that you can hold the bowstring back pretty easily, allowing yourself more time to aim.
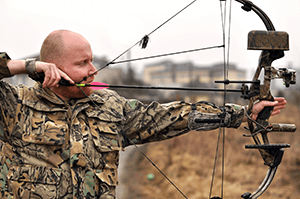
As you practice your draw, the arrow's nock should come to the same place every time. Most archers use a spot just past their mouth as an anchor point. Using that same spot as the index every time you draw back will give you repeatable results and consistency. Don’t worry, it’s not going to scratch your cheek when you release the bowstring and the arrow takes flight.
Important: NEVER dry fire a bow! "Dry firing" is when you pull the bowstring back and release it without an arrow. Since the energy isn’t transferred properly, this will damage the bow and is very dangerous. Even if you don’t see an obvious sign of damage, it’s definitely there. A dry-fired bow should be taken to a qualified professional for inspection and repair. When practicing your draw without an arrow, keep the bowstring in your draw hand and hold it while allowing the string to slowly return to its resting position.
Aim
Aiming is done with the bow, not the arrow. This might seem backward, but when you have consistent placement of the arrow on the arrow rest, the nock is in the same place on the bowstring (at the D-loop, more on that below). Since you’re drawing to that same anchor point on your cheek every time you draw, the arrow will be in the exact same position every single time. Your extended bow arm will move the bow's arrow rest up, down, left, right, and diagonally until you're on target and ready to release.
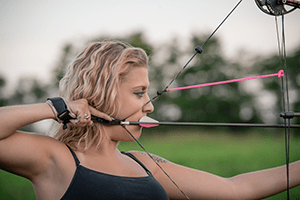
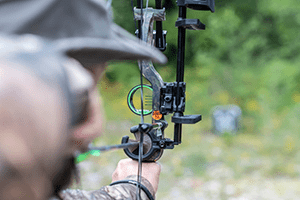
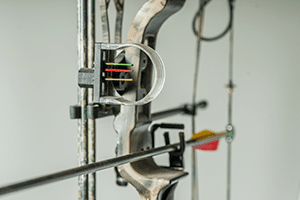 The main section of the bow between the limbs is called the riser. This contains the grip in the middle, an arrow shelf above that where the arrow rest is mounted, and a section above that known as the sight window. The sight window is where the front bow sight is located, most often with compound bows. This will be a pin sight, which is a circle with horizontal pins inside to adjust for elevation (shoot higher or lower). Tied right into the bowstring is a peep sight which acts as the rear sight. A peep sight is a round aperture that allows you to look through and align with the pin in the front sight.
It sounds pretty complicated. But as soon as you draw a compound bow, it all comes together, and you’ll realize how natural and intuitive the aiming process is.
Release
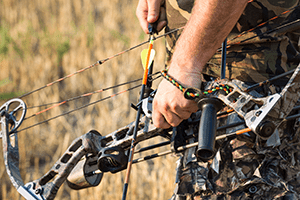
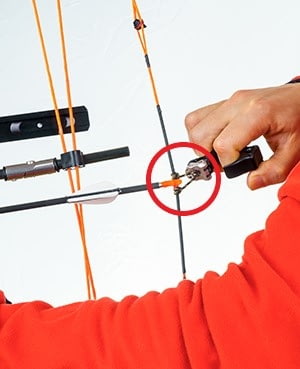 As mentioned above, there are a variety of different mechanical releases available on the market. They clip to an attachment point, usually a smaller piece of string attached to the bowstring that's called a "D-loop" (as seen in this picture, circled in red). That section of the string is used as the nocking point for the arrow for that all-important consistency in placement. When you're lined up with your aim, you'll slowly squeeze the release trigger until the arrow flies. You don't want to jerk the release, as that will throw off the arrow's trajectory.
Your draw hand should still be at your cheek anchor point, and you shouldn't try to grab the bow grip at the last second. Follow-through is important, and it’s more about keeping your body still and letting the physics of a bow and arrow take over. Your hand will naturally catch the bow in the split second after the arrow flies and the bow starts to tip forward. Most compound bow shooters use a simple wrist loop-style lanyard to assist with this catch.
So there you have it, the beginner’s basics of how to shoot a compound bow. The more you practice your fundamentals, the more proficient you’ll become. Archery is a lot of fun, so practice is never tedious!
Learn more in our Archery Equipment Guides, and get everything you need in one place by shopping the Archery section here at OpticsPlanet.com!


